The middle bit sounds a little bit passive really for what is about to come because after my last post I have fully applied my Agile approach and, well, a lot has been done. With all my idea generation tied up and an idea firmly in place, alongside its relevant project management I went full on into development.
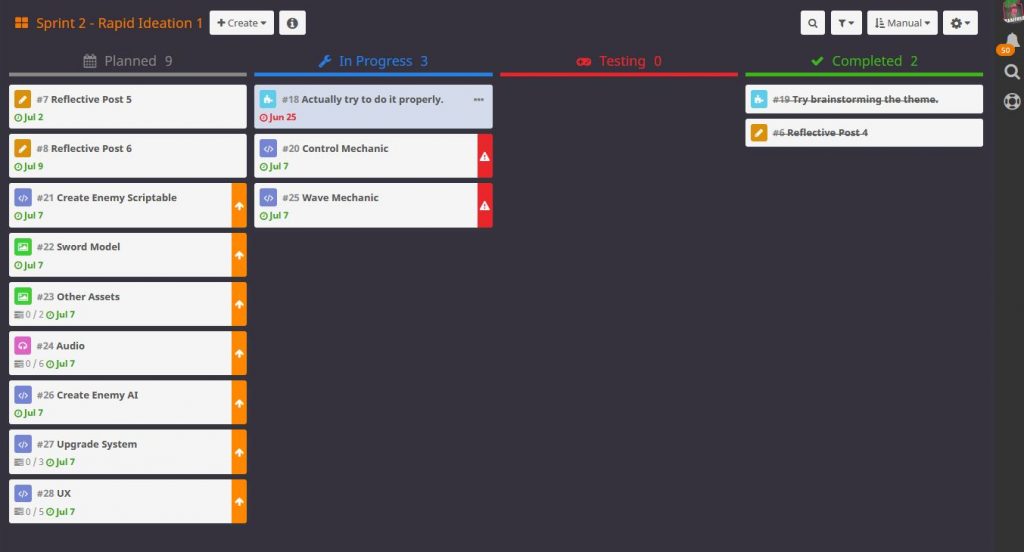
So as you can see I had already prioritised what I needed to work on first, a control mechanic and a wave mechanic. So I went straight at the control mechanic, considering if I could not get that working I would be really stuck.
So what I wanted was for an object to turn to face the position of the mouse on the screen. Now obviously this was going to be a case of finding the position of the mouse in relation to the object and then have it look at this position. So a little digging on the API brought me to transform.LookAt(). This function rotates the transform of an object so that its local forward vector points at a targets current position. It was exactly what I needed. Now all I needed to do was get the mouse position and use that as the target.
Unity, thankfully, has a really nice way to do this using the camera and raycasts. Using ScreenPointToRay() and passing in the Input.mousePosition and as argument you can shoot an imaginary line into a plane and work out where in the world this line is colliding with the plane. This gives a Vector3 position that you can then use as the target to lookAt().
So by combining these two things and establishing a position to lookAt() you end up with the following.
|
1 2 3 4 5 6 7 8 9 10 11 12 13 14 15 16 17 |
void Update() { Vector3 moveInput = new Vector3(Input.GetAxisRaw("Horizontal"), 0f, Input.GetAxisRaw("Vertical")); Vector3 moveVelocity = moveInput * moveSpeed; Ray cameraRay = mainCamera.ScreenPointToRay(Input.mousePosition); Plane groundPlane = new Plane(Vector3.up, Vector3.zero); float rayLength; if (groundPlane.Raycast(cameraRay, out rayLength)) { Vector3 pointToLook = cameraRay.GetPoint(rayLength); Debug.DrawLine(cameraRay.origin, pointToLook, Color.cyan); transform.LookAt(new Vector3(pointToLook.x, transform.position.y, pointToLook.z)); } } |
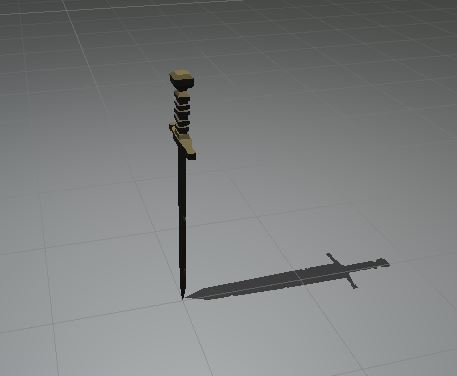
Now you just need to add this into a script and attach it to the object you want to move around. So at this point I decided it was probably wise to begin to construct the player character. It was going to be a sword and I knew I have plenty of swords in my existing assets packs so I went and grabbed one and brought it into the game.
And then the inevitable happened, I got sidetracked. Instead of just putting in the sword and getting it moving I decided to try and build the whole player character. So off I went trying to work out how to cast shadows and work out their locations and be able to add collision or triggers to shadows and so on and so on. Then it hit me, why bother with trying to use actual shadows? Why not create a shadow yourself and use this, then you can do anything you want with it.
So I took the model of the sword, rotated it flat, reduced its z scale to 0 and I had a shadow. Just needed to position it so that it looked like it was being cast by the sword and obviously make it a child of the swords itself, so that it would move when the sword moved and it worked.
So can I stop being sidetracked now? Nope. It needs something to cast the shadow, a light. So in went a spotlight, again as a child of the main sword so that it moved with the rotation. Then I needed something to cast the light, so into the asset packs to find a spotlight model, again child of the sword. And then I tried it out. Well it worked but something was missing. There was nothing to lead the player, you had this light off to the side and the there was no connection between this and the player model, so it was hard to control.
I needed a light beam between the light and the player. So I had to somehow create a fake light beam, a cone shape that had a texture fade off that was transparent and had no collision. So not much really.
I tried to create a cone in Blender but it just would not work for me, it was solid for one thing, I did follow some tutorials in order to try and make it hollow but was unsuccessful. This is why I don’t do 3D much, it is just a vast subject that I do not have time to get into (or a desire to, I can get others to do it for me). So I thought about what would be the easiest way possible to do this and then I remember ProBuilder. This is a plugin for Unity that allows you to create 3D models and shapes within the editor, it extends upon the built in primitive system and allows you to manipulate these basic objects into what you need. So within 5 minutes I had a hollow cone that I could use and manipulate as I needed.
Now to sort the texture out. Quite simple really, open Photoshop, create a texture with a gradient that fades out in white and problem sorted. Did this and brought it in to Unity, applied it to the cone and changed its Albedo colour to yellow, and it was solid. Oh yeah the basic shaders do not handle transparency, thankfully I have already experienced this problem before and have already written a shader to deal with this.
|
1 2 3 4 5 6 7 8 9 10 11 12 13 14 15 16 17 18 19 20 21 22 23 24 25 26 27 28 29 30 31 32 33 |
Shader "Unlit/UnlitAlphaWithFade" { Properties { _Color ("Color Tint", Color) = (1,1,1,1) _MainTex ("Base (RGB) Alpha (A)", 2D) = "white" } Category { Lighting Off ZWrite Off //ZWrite On // uncomment if you have problems like the sprite disappear in some rotations. Cull back Blend SrcAlpha OneMinusSrcAlpha //AlphaTest Greater 0.001 // uncomment if you have problems like the sprites or 3d text have white quads instead of alpha pixels. Tags {Queue=Transparent} SubShader { Pass { SetTexture [_MainTex] { ConstantColor [_Color] Combine Texture * constant } } } } } |
So I put this all together, added a small amount of level construction in and this is what I ended up with.

Character controller done. And some of the player aspects.
So next thing was the enemies, now thankfully all these had to do was spawn off screen and move towards the sword. Nice and easy really. There is already a way to move objects towards a point in script. Vector3.MoveTowards() when given an object, a position and a step time will do it for you. So I create a basic enemy using assets I already had and added this code to it, gave it a speed and I had a moving enemy. I just needed to spawn it off screen and let it do its thing.
This is where I had to reach out for a little help, I knew I wanted to utilise a circle in someway to do this, so basically use a circle around the sword in order to work out the spawn position, if I knew where this circle was I could randomly chose a point on the edge of the circle and use this to spawn an enemy. This would mean the enemies would all spawn the same distance away from the player. A little of googling found a solution to this by robertu (2014).
|
1 2 3 4 5 6 7 8 9 10 11 12 13 14 15 16 17 18 19 20 21 22 23 24 25 26 27 28 29 30 31 32 |
using UnityEngine; using System.Collections; public class EnemySpawner : MonoBehaviour { public int numObjects = 10; public GameObject prefab; void Start() { StartCoroutine(SpawnWave()); } Vector3 RandomCircle ( Vector3 center , float radius ){ float ang = Random.value * 360; Vector3 pos; pos.x = center.x + radius * Mathf.Sin(ang * Mathf.Deg2Rad); pos.y = center.y; pos.z = center.z + radius * Mathf.Cos(ang * Mathf.Deg2Rad); return pos; } IEnumerator SpawnWave() { Vector3 center = transform.position; for (int i = 0; i < numObjects; i++){ Vector3 pos = RandomCircle(center, 20.0f); Quaternion rot = Quaternion.FromToRotation(Vector3.forward, center-pos); Instantiate(prefab, pos, rot); yield return new WaitForSeconds(0.5f); } } } |
This worked really well so I added in a little model selector to change the enemies when they spawn and added this to the enemy controller and ended up with the following.
|
1 2 3 4 5 6 7 8 9 10 11 12 13 14 15 16 17 18 19 20 21 22 23 24 25 26 27 28 29 30 31 32 33 34 35 36 |
public class EnemyController : MonoBehaviour { private Transform target; public float speed; public GameObject[] models; private bool CanMove; // Start is called before the first frame update void Start() { //Grab the player as the target target = GameObject.Find("Player").transform; //Change the model of the enemy at random GameObject clone = Instantiate(models[Random.Range(0,models.Length)], gameObject.transform.position, Quaternion.identity); //Parent it to this enemy clone.transform.parent = this.gameObject.transform; //Make it look at the target clone.transform.LookAt(target); //Change its scale clone.transform.localScale = new Vector3 (0.5f, 0.5f, 0.5f); //Start the movement coroutine StartCoroutine(CheckForMovement()); } // Update is called once per frame void Update() { if (CanMove){ // Move towards the target float step = speed * Time.deltaTime; // calculate distance to move transform.position = Vector3.MoveTowards(transform.position, target.position, step); } } } |
Thankfully at this point I was able to use my existing knowledge to start putting a lot more of the game together. As you can see in the image above the enemies do not die or cause you damage, so I put that in next. Thankfully my decision to use a model as the shadow really helped here as I was able to just switch its mesh collider to being a trigger, so when an enemy touches the shadow it registers it and I kill it, adding one point to the player’s score. If the enemy touches the sword’s collider this takes off one point of health and destroys the enemy. A really simple system in effect.
So I hooked up some UI elements to this, created a Player Manager and a UI Manager script to handle all this and I had the makings of a game. However when I went to play it the game was really easy, you could just spin your mouse around and kill everything that came at you.
So I had to make it harder, well I could speed up the enemies and make it more frantic, not what I wanted really. I could give the enemies more health and use a damage over time mechanic, but this would cause lots of problems with speed of enemy and damage ticks. What I finally decide on was to have the enemies movement become erratic, so instead of just moving towards the player, they would move a little then stop, then move, then stop, and if I added in some random aspect to the wait times it would mean that the player would not know when an enemy was going to move.
|
1 2 3 4 5 6 7 8 9 10 11 12 13 14 15 16 17 18 19 20 21 |
// Update is called once per frame void Update() { if (CanMove){ // Move towards the target float step = speed * Time.deltaTime; // calculate distance to move transform.position = Vector3.MoveTowards(transform.position, target.position, step); } } IEnumerator CheckForMovement(){ //This functions provide the graduated movement for the enemies. int Coinflip = Random.Range(0,10); if (Coinflip >= 7) { CanMove = true; } yield return new WaitForSeconds(0.5f); CanMove = false; StartCoroutine(CheckForMovement()); } |
Above you can see my solution to this. I use a boolean to decide when the enemy can move, if this boolean is true it can move, if it is not then it cannot. This boolean is controlled in the CheckForMovement() function where it uses weighted random choice (that Fortnite Chest prototype came in handy already) to decide when to allow the enemy to move. Then once it has done this it runs itself again, so it is constantly changing its minds basically. I will be revisiting this later to allow me to add in more weighting as the game progresses so the game gets harder.
But this is what I ended up with after my first 3 hours of development.

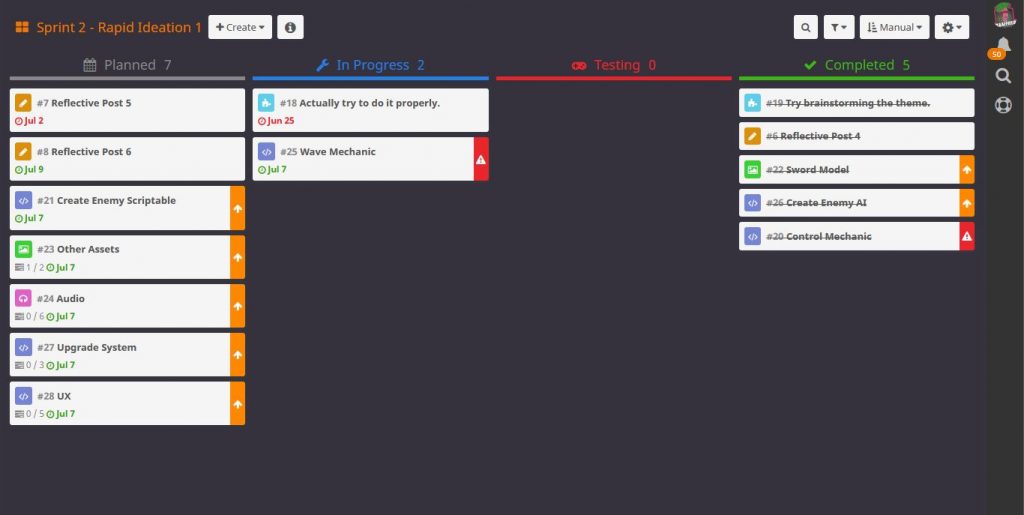
I was really happy with the progress I had made, however I still had a major part of the game I needed to get done, the wave mechanic. So I had not really stuck to my project management, however when you see the end result of what I did achieve and the project management plan you can see that I did manage to get a lot done.
Now if only I had remembered about that ‘Do it properly’ task. My next job is the Wave Mechanic, once this is in it will just be a question of putting it together and adding in the upgrade system. Thankfully I have had this in the back of my mind as I have been making it so I think this will be easy as I can now give the user the ability to add health, change the length and width of their shadow, and possible buy score multipliers to allow them to earn more points. I will use these points in the upgrade system so you must sacrifice score in order to generate more score.
Tomorrow I get to do more development so we will see where that goes.
References
Technologies, U., n.d. Unity – Scripting API: Transform.LookAt. [online] Docs.unity3d.com. Available at: <https://docs.unity3d.com/ScriptReference/Transform.LookAt.html> [Accessed 30 June 2021].
Technologies, U., n.d. Unity – Manual: Rays from the Camera. [online] Docs.unity3d.com. Available at: <https://docs.unity3d.com/Manual/CameraRays.html> [Accessed 30 June 2021].
Unity. n.d. ProBuilder. [online] Available at: <https://unity3d.com/unity/features/worldbuilding/probuilder> [Accessed 30 June 2021].
Technologies, U., n.d. Unity – Scripting API: Vector3.MoveTowards. [online] Docs.unity3d.com. Available at: <https://docs.unity3d.com/ScriptReference/Vector3.MoveTowards.html> [Accessed 30 June 2021].
robertu, 2014. Spawn prefabs in a circle? – Unity Answers. [online] Answers.unity.com. Available at: <https://answers.unity.com/questions/714835/best-way-to-spawn-prefabs-in-a-circle.html> [Accessed 30 June 2021].
Figures
Featured Image: Charlish, R (2021) ‘Image of the game’ Created on July 3rd 2021
Figure 1: Charlish, R (2021) ‘Hack n Plan project managed’ Created on 25th June 2021
Figure 2: Charlish, R (2021) ‘Sword model with fake shadow’ Created on July 3rd 2021
Figure 3: Charlish, R (2021) ‘Sword mechanic’ Created on July 3rd 2021
Figure 4: Charlish, R (2021) ‘Enemies’ Created on July 3rd 2021
Figure 5: Charlish, R (2021) ‘Basic game’ Created on July 3rd 2021
Figure 6: Charlish, R (2021) ‘On going project management’ Created on July 3rd 2021


0 Comments