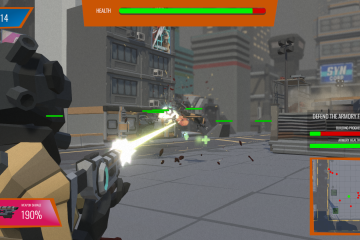
For my trailer I had an idea of what I wanted to create but needed to source the music first. I wanted to create a tense feeling at the start of my trailer before moving on to a more frantic feel to really portray the feeling of the game. I knew that 1 min was not a lot of time to get everything across in but that what I had to play with. So tense and then frantic was what I was looking for.
It also obviously had to be free to use, I am no musician so outsourcing was my only option. I managed to find what I needed from Fesliyan (2019) in a track called Villainous. Thankfully there is a detailed policy page that explains the usage rights for the track and it fits within my requirements so I was able to utilise this track within the trailer.
Now that I had the music I had a great starting map from which to work from. I decided I would storyboard up the trailer using screen shots from the game I had already created.
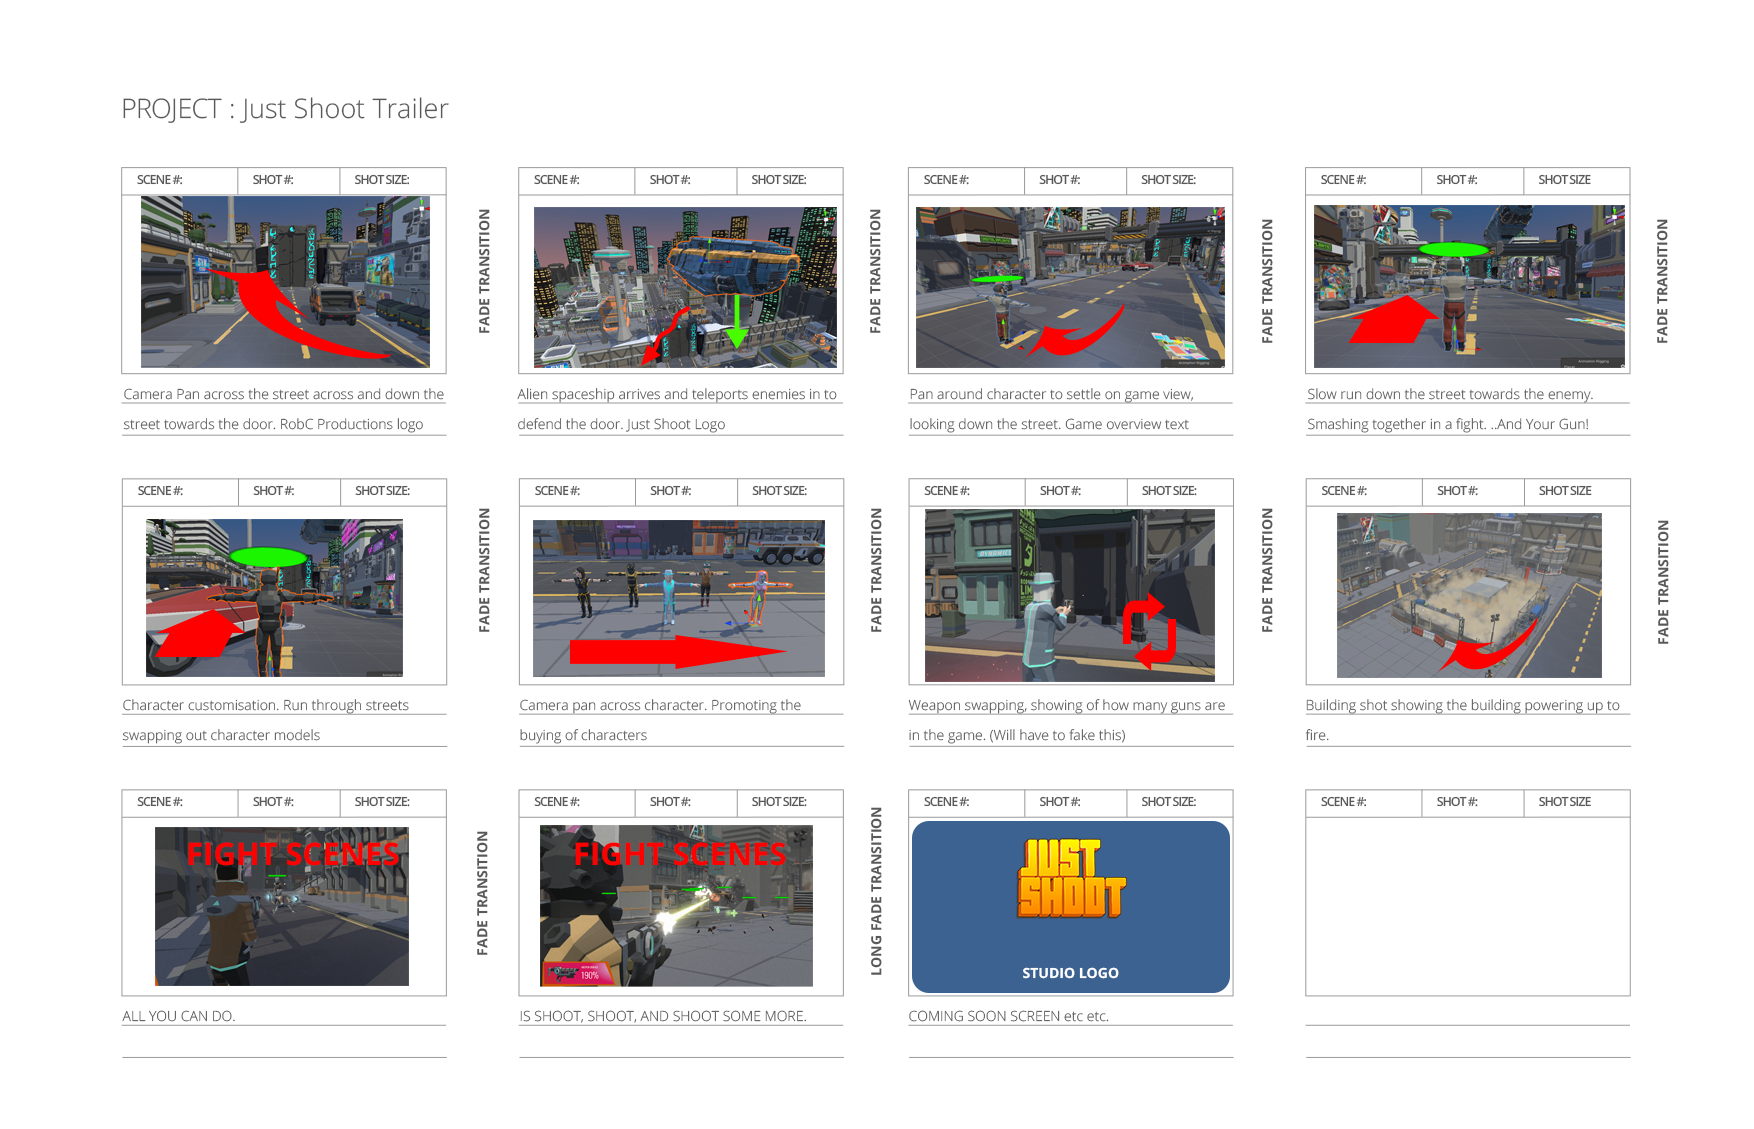
I utilised basic shapes from Photoshop to signify the camera pans and intentions of each scene so I knew what I was needing to create. Now it was just a matter of working out how to do it.
I decided to create a new scene in Unity just to create the trailer in. This was I could edit it and move things around without affecting the prototype levels and accidentally breaking the game. It would also allow me to add in specific elements that I wanted to use for the trailer.

Next was taking each of the shots from the storyboard and recreating them within the editor so that I could capture it. I have used Cinemachine before but purely from a game making point of view so I needed to explore its possible uses to create a more cutscene/trailer based type of content. Thankfully there is a wealth of tutorials on how to use Cinemachine and I was originally considering combining it with Unity’s Timeline feature in order to create the whole cutscene. I had a change of heart after an hour of playing around with it however as I found a much easier way for me to put the trailer together.
I could just use shorter per-constructed clips from the game engine and edit them together in Adobe After Effects. The main reason for this thought process was the ability to control the effects in between the clips, add text, and ultimately align it to the soundtrack.
I was still going to use the Cinemachine cameras in order to create the shorter clips but would not need to use the timeline thanks to the Cinemachine Brain feature.

The Brain controls all of the cameras in the game and utilises the most current active camera with the highest priority setting. If this camera gets disabled the Brain changes to the next highest priority camera, however it uses the Default Blend option, seen in the image above, to handle how it transitions to this next camera. By setting the easing and giving the transition a time that would be the length of the short clip, this creates a lovely camera pan within the game. I could then just OBS out the game as it played and have my short clips all pre-scripted.
So for the rest of the trailer I had to create some specific set ups for what I needed.
- Shot 1: Camera pan down the street. Two virtual cameras positioned at start and end with a 8 second transition time.
- Shot 2: Spaceship lerping down with additional camera pan, 6 second transition time.
- Shot 3: Camera pan around the character. 3 cameras needed for this one to create the effect. Cameras disabled in sequence.
- Shot 4: Follow camera on the player as he runs down the street. Used game camera with UI turned off.
- Shot 5: Follow camera on the player with the character model switching as they run.
- Shot 6: Camera pan (using two cameras) across the front of the player duplicated several times with different character models active. 6 second transition time.
- Shot 7: Weapon shot using in game camera with UI turned off.
- Shot 8: Building firing lasers, static camera with script to activate particles through a co-routine.
- Remaining shots: All game footage.
I did need to create a couple of extra scripts but was able to re-use them multiple times in order to create the different shots need.
So for example with the disabled camera script, as I was using a coroutine I was able to fire off other events within this script such as the particles for the building.
|
1 2 3 4 5 6 7 8 9 10 11 12 13 14 15 16 17 18 19 20 21 22 23 24 25 26 27 28 29 |
using System.Collections; using System.Collections.Generic; using UnityEngine; using Cinemachine; public class DisableCamera : MonoBehaviour { public GameObject[] particles; public CinemachineVirtualCamera ttest; // Start is called before the first frame update void Start() { StartCoroutine(shutdown()); } IEnumerator shutdown(){ yield return new WaitForSeconds(1); ttest.enabled = false; yield return new WaitForSeconds(4.0f); for (int i = 0; i < particles.Length; i++) { particles[i].SetActive(true); yield return new WaitForSeconds(0.2f); } } } } |
And to move things around in the game I was able to repurpose my lerp script from the building mechanic in the game and use this to lerp any object between two points over a specific amount of time, this is how I did the ship coming in to shot. As you can see I was able to script in the enemies to spawn as well with a simple For Loop and an array.
|
1 2 3 4 5 6 7 8 9 10 11 12 13 14 15 16 17 18 19 20 21 22 23 24 25 26 27 28 29 30 31 32 33 34 35 36 37 38 39 40 41 42 43 44 45 46 47 48 49 50 |
using System.Collections; using System.Collections.Generic; using UnityEngine; public class ShipLerp : MonoBehaviour { public float lerpTime = 0.1f; float currentLerpTime; public float moveDistance = 1f; private float perc = 100; Vector3 startPos; Vector3 endPos; public GameObject[] enemies; public GameObject cam; protected void Start() { startPos = transform.position; endPos = transform.position + transform.up * moveDistance; StartCoroutine(SpawnEnemies()); } protected void Update() { //increment timer once per frame currentLerpTime += Time.deltaTime; if (currentLerpTime > lerpTime) { currentLerpTime = lerpTime; } //lerp! perc = currentLerpTime / lerpTime; transform.position = Vector3.Lerp(startPos, endPos, perc); } IEnumerator SpawnEnemies() { yield return new WaitForSeconds(0.2f); cam.SetActive(false); yield return new WaitForSeconds(4.0f); for (int i = 0; i < enemies.Length; i++) { enemies[i].SetActive(true); yield return new WaitForSeconds(0.2f); } yield return new WaitForSeconds (10.0f); } } |
So once I had all the shots I need to create a couple of things for the trailer which included logos and fade screens but was left with the following folder of content.

It was then just a matter of editing everything together into a single video. For that I used After Effects, I was considering using Adobe Premier to just edit the clips together but I wanted the option to utilise some of the more advanced aspects of After Effects. In the end I did not need these but I was glad I did choose to use After Effects just in case.

And after about an hour of tweaking and encoding I ended up with my final trailer. Obviously I put it in front of a few people, got some feedback, corrected the spelling mistakes and re-encoded it up to create the final version.
The Final Trailer
On reflection there are some things I would like to change about the trailer to really give it that final feel. One I would remove the errant cursor that shows up and also the white dot aiming canvas I left on for all the capturing, and two I would like to remove some of the UI text so that the trailer text pops out a little more and does not get lost. But I do think that this is a pretty good and perfectly serviceable trailer for Just Shoot.
References
Docs.unity3d.com. 2022. About Timeline | Timeline | 1.2.18. [online] Available at: <https://docs.unity3d.com/Packages/com.unity.timeline@1.2/manual/index.html> [Accessed 2 January 2022].
Fesliyan, D., 2019. Villainous by David Fesliyan – Royalty Free Music Download. [online] Fesliyanstudios.com. Available at: <https://www.fesliyanstudios.com/royalty-free-music/download/villainous/397> [Accessed 2 January 2022].
Fesliyan, D., n.d. FesliyanStudios – FAQ / Policy. [online] Fesliyanstudios.com. Available at: <https://www.fesliyanstudios.com/policy> [Accessed 2 January 2022].
Unity Technologies, n.d. Cinemachine – Unity Learn. [online] Unity Learn. Available at: <https://learn.unity.com/tutorial/cinemachine> [Accessed 2 January 2022].
Figures
Featured Image: Charlish, R (2021) ‘The Door – Trailer Thumbnail’ Created on 30th December 2021
Figure 1: Charlish, R (2021) ‘Trailer storyboard’ Created on 30th December 2021
Figure 2: Charlish, R (2021) ‘Trailer Scene in Unity’ Created on 30th December 2021
Figure 3: Charlish, R (2021) ‘Cinemachine Brain’ Created on 30th December 2021
Figure 4: Charlish, R (2021) ‘Example camera pan using Cinemachine Brain and two Virtual Cameras’ Created on 30th December 2021
Figure 5: Charlish, R (2021) ‘All the parts of the trailer’ Created on 30th December 2021
Figure 6: Charlish, R (2021) ‘After Effects editing’ Created on 30th December 2021
Figure 7: Charlish, R (2021) ‘The final Just Shoot trailer’ Created on 28th December 2021